When booking one-way travel to a foreign country, there is often the catch-22 of having to show proof of an onward flight, in order to even board your departing plane.
And when dealing with the boarding policies of an airline, typically you either fork up the money for a return ticket that you may never use, miss your flight, or you try the very risky tactic of forging a plane ticket.
But I cannot recommend taking illegal actions just to get around immigration policies, even as non-sensical as they can be.
Yet I will present how to use an online service for displaying your intention of onward travel, in order to board an international flight without having to actually book a ticket in advance for onward travel.
Previously I wrote about 5 little-known travel hacks for showing proof of onward travel. If you haven’t read this in-depth article yet, I highly recommend that you do.
Step 1: Register an account on TripIt
Signup for a free TripIt account to create a travel itinerary which will later include your outbound flight.

The registration process can sometimes be troublesome when signing with your e-mail address. So if issues arise for you, I recommend that you register using your Facebook, Google, or Yahoo account.
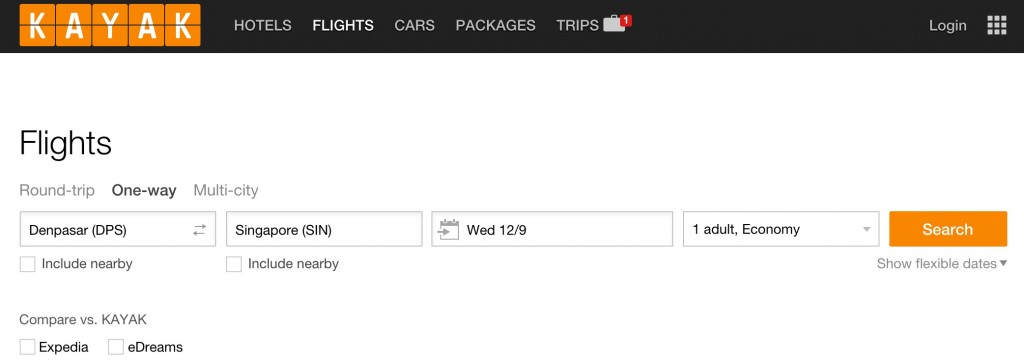
Step 2: Use Kayak.com to find an outbound flight
Before moving any further with TripIt, you’ll want to lookup an outbound flight from the country that you will be visiting.
You can do this by searching for a flight on the travel booking website, Kayak.com. 
Just be sure that these two conditions are satisfied:
- The flight is with a different carrier than that of the flight you’ll actually be arriving with.
- Your departure date is within the time-frame you are allowed to stay during your visit. For example; Thailand allots 30 days of validity for the tourist visa-on-arrival for most nationalities.
Once you find the ideal international flight on Kayak.com for your departure, click the link to “show details” and copy down the flight information or just keep that browser tab open for this next step…
Step 3: Create a new itinerary with your fight details
Before you can plan out the details of your potential itinerary on TripIt, you must create a new “Trip” — which is essentially your travel itinerary.
After your new Trip is created, click the button shown below for adding your planned flights:
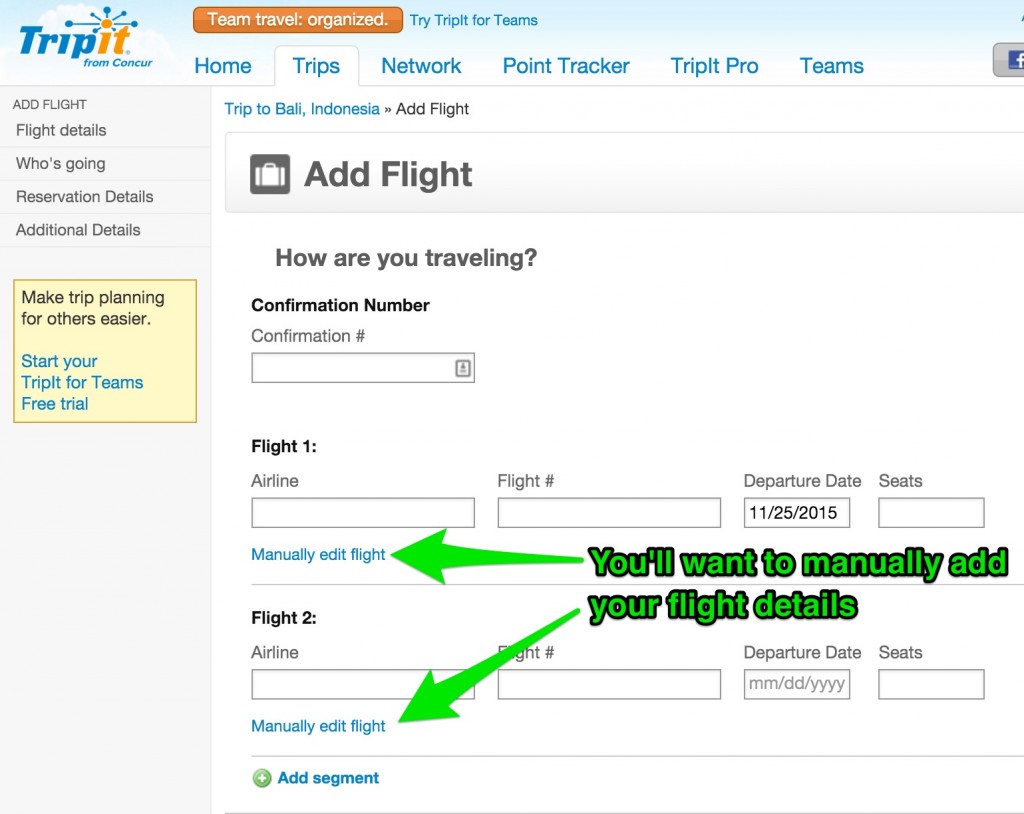
Now you can proceed with your itinerary details. Do this by clicking the link to “Manually edit flight”:
The ONLY information needed for your flights are:
- Airline name
- Flight #
- Departure airport
- Departure Date
- Departure Time
- Arrival airport
- Arrival Date
- Arrival Time
You’ll first enter this information for your arrival flight. Then you’ll proceed to do the same for your planned exit flight.
Lastly, click the save button at the bottom of your travel plans.
Step 4: Print your itinerary
To print your itinerary go back to your Trip tab and then click on the printer icon located underneath the title of your trip.
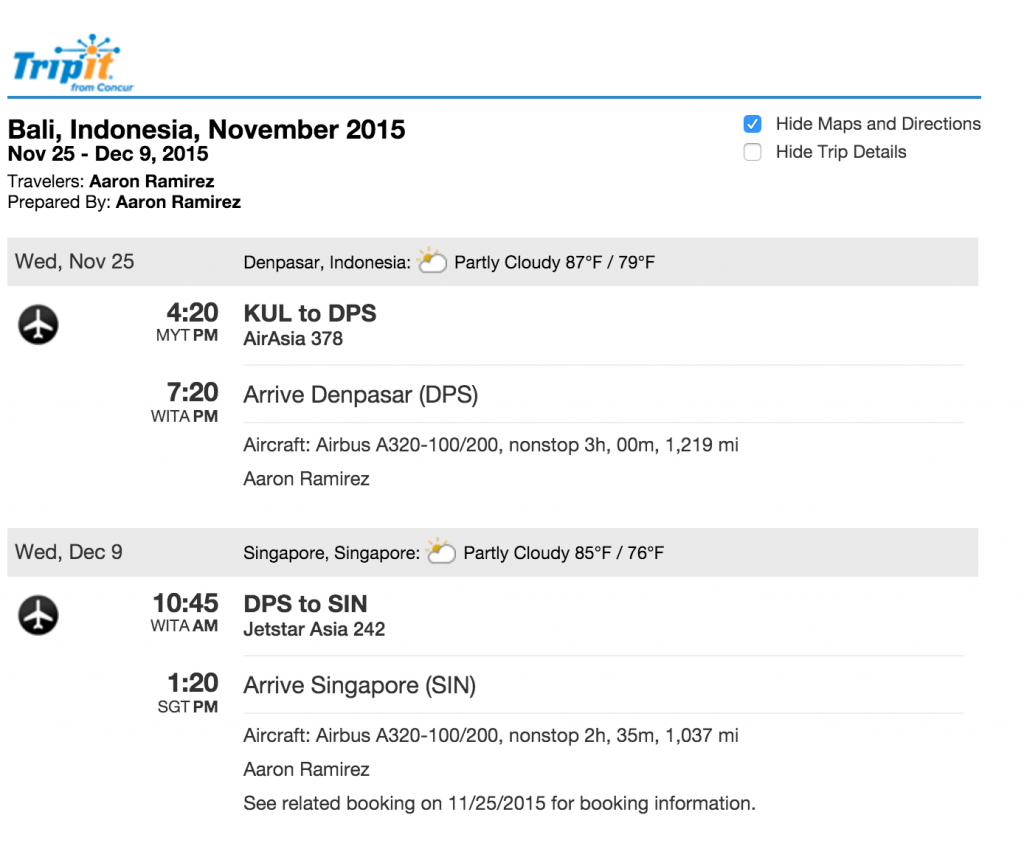
[caption id="attachment_503” align="aligncenter” width="740”] Your itinerary should appear as plain and simple as this.[/caption]
Step 5: Prepare your game plan
‘60% of the time it works… every time.’ – Brian Fantana (Anchor Man)
While I’ve personally had zero issues during the numerous times that I’ve carried an itinerary for a flight I hadn’t booked yet as proof of onward travel — you just never know if an airline clerk or someone at an immigration desk will not be happy with it.
Because what has consistently worked for myself and others when it comes to travel hacking, presents no guarantee for you.
So with that said, it is important for you to understand the importance of preparing a game plan for preventing and handling a worse case scenario of your TripIt itinerary failing to get you on a flight or through customs.
First of all, show up to the airport at least a couple hours before your departure, so that you are not put in the stressful situation of trying to talk your way onto your flight — minutes before your departure gate closes.
Then if you are questioned about having an outbound flight (often times, no one ever does ask), whip out your printed itinerary with confidence. No need to lie about not having booked the flight. But if you are asked outright, do one of the following…
- Insist that you will be traveling on the flight, but if they don’t cave, be prepared to book a fully-refundable ticket as explained in this complete guide to showing proof of an onward flight.
- Bring recent bank statements that can show that you have adequate funds to pay for your travel expenses during your temporary stay. Again, see my 5 travel hacks for showing proof of onward travel.
Bon voyage!


